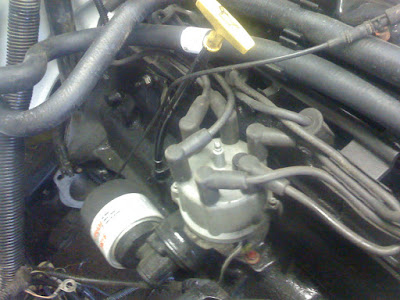
So maybe I was a little too optimistic with my last post thinking that I might be able to get my Jeep done by the end of June. The wiring turned out to be harder than I expected and I spent a good two weeks getting everything hooked up correctly. But the good news is that I am pretty much done with the wiring and I have succeeded in getting the engine to both turn over and start!
A co-worker (who happens to be an Electrical Engineer) came by on Wednesday and took a look at my wiring and helped me figure out some of the things that were missing or incorrect. Apparently between 1992 and 1993 Jeep decided to move the wire that runs from the ignition switch to the starter relay, which I didn't realize. Eventually I tracked both wires down and was able to get them connected. I also didn't have the wiring grounded well enough, and without grounds there is no where for the current to go and hence there is no power in the circuit.
So on Friday evening, after moving some wires and adding some grounds, I was finally able to get my starter to run and turn my engine over, which was a great feeling. On Saturday I repositioned one of my ground wires from the engine to the firewall (I had two engine grounds from my battery but no body ground) and this gave me power to all my dash electronics, my windshield wipers, blinkers, etc. Before I finished work on Saturday I sprayed some starter fluid into the throttle body, turned the key, and was able to get the engine to fire up. It died after a few seconds (once the starter fluid burned up), but hearing the engine run was awesome and gives me a lot of hope.
Some of the other things I got done this weekend include:
- Reinstalled my newly adjusted & balanced drive shafts (the adjustments were $$$!)
- Painted and installed the brake booster and installed the master cylinder
- Installed the gas pedal and gear shifter (for my test drive)
- Installed the grill
- Removed the radiator from the grill (for a professional radiator flush today)
- Semi-installed the exhaust down pipe (still needs to be bolted in)
I am very close to having the Jeep drivable. I found a new fuel rail on eBay this weekend and purchased it; when I receive it I will install it and lengthen my fuel lines. I also need to get the wiring for my fuel pump hooked up. Then I need to bleed my brakes, install the driver's seat, and take it for a spin!
Dave and I spent a bunch of time on Saturday reorganizing his garage; we moved a lot of stuff out and brought it down to his barn/other garage. There is now a LOT more work space and it is much more organized and very clean.
Monday, June 29, 2009
Tuesday, June 16, 2009
T-Minus Two Weeks 'til Completion (Hopefully)
I wasn't able to get too much done this past weekend due to the fact that I simply do not know how to hook up certain parts of the wiring harness and because I still need to acquire some parts. A couple things which I DID get done include:
- Painted and installed the MAP sensor and the battery holder, I like the look of the gloss black against the gloss white of the firewall
- Bended and installed both of the rear brake lines, this was actually kinda fun using the brake line bending tool. I can now officially say that I've done a complete brake job.
- Put all the wheels back on (now that the brakes are done)
- Started to do some body work and repair; the picture below shows the first layer of aluminum paste applied to the section of the body that was cut out and replaced. The aluminum will harden and after several layers will be flush with the original body panels.
- Finally removed my rear bumper; I ended up having to grind off the last bolt. I like the look of the rear bumper/frame being flush with the tailgate and I think I will leave it this way (perhaps with a coat of black Rustoleum)
I bought and installed a new Crankshaft Position sensor ($80 at AutoZone, ouch) which solved my problem of not being able to find a plug on my wiring harness that fit the CPS (my old CPS was for a different year Jeep). I also bought a new fuel rail on eBay yesterday ($25, not bad) which will allow me to keep my current fuel system set-up. My current fuel rail is designed for the Grand Cherokee which uses a fuel pressure regulator instead of fuel delivery and return lines.
As you can infer from the title, I am hoping to have the Jeep done by the end of the month. I'm not far from having the engine and wiring harness completely installed and hooked up. After that, I just need to get my driveshafts adjusted (to accommodate for the longer transmission) and the skid plate bolted on and I should be able to drive it. Finally, I'll need to finish up the body work and paint it!
Friday, June 12, 2009
Seeing the Light at the End of the Tunnel
I've put in 3-4 hours during each of the past two nights working on the Jeep, spending most of my time hooking up the wiring harness and the other various components that go in the engine bay. As I expected, I've started running into problems, mostly consisting of the need to buy missing parts. I've also had some problems involving compatibility issues between my Jeep (92 Wrangler), my engine (96 Grand Cherokee) and my wiring harness (93 or 94 Wrangler). If I could do it all over again, I would definitely have looked for a Wrangler or Cherokee that had been totalled so I could have taken everything (engine, trans, wiring) out of the same vehicle in order to avoid these little problems along the way.
One of my problems is that my fuel lines are too short to connect to the fuel rail of the 6 cylinder motor. I recently discovered that I might need to go as far as dropping my gas tank and changing the fuel pump... I really hope that's not the case.
I removed the rails from the bottom of my old seats so that they could be thrown out. I then mounted the passenger rail to the bottom of the seat that I bought while I was in Pittsburgh. Now I just need to find a matching driver's side seat and a rear bench seat.
Another problem that I have is that I am missing the ignition coil and the wire which deliver the spark to the spark plugs. The ignition coil attaches to the center pin of the distributor cap.
I am also having some trouble determining the exact location and orientation of the power steering pump. And of course I don't have the right bolts to mount it to the motor. The biggest and most annoying problem during this project by far has been the need to track down the right type of bolts to connect things during EVERY stage of the rebuild.
Finally, I have two identical male plugs, one coming from the crankshaft position sensor and the other coming from the wiring harness adjacent to the CPS. I read online that the green plug hooks up to the MAP sensor, so I'm not sure where to plug in the CPS...
Wednesday, June 3, 2009
The Little Engine That Could
I reached a fairly major milestone yesterday: getting my new engine mounted in my Jeep. Sure, there's still a lot of work to do before it's drivable (let alone finished), but it feels good to have gotten this far.
It took Dave and I about an hour to maneuver the engine into place and weld the mounts to the frame. I think we got pretty lucky because all we really had to do was jack it up high enough to clear the frame and then push the cherry picker while guiding the transmission into the hole in the firewall. It ended up sitting in perfect position with very little adjustment.
The two most important factors in the engine positioning were: 1) making sure that the hole in the floor of the body was positioned above the part of the transmission where the gear shifter will be bolted in, and 2) getting the valve cover as close to the firewall as possible so that there won't be any clearance issues when the radiator is re-installed.
Once the engine was in a good spot, Dave made some small welds between the motor mounts and the frame. Then we were able to lower the engine a bit with the cherry picker so that it settled into place. The weight of the engine also cause the motor mounts to sit flush against the frame, making it easier to create a solid weld.
After the engine was securely welded in place, I decided to install my new front shocks which I ordered last week. It was a really easy install which only took about 20 minutes. They will not only improve the ride quality, but the fresh white shocks and the clean black shock boots looks really nice.
Subscribe to:
Posts (Atom)